How I made Diwali Cards with Python

Here to give you guys a good read, in a different way with each blog. Not a niche-specific blogger. To be honest, I'm just blogging with the aim of applying knowledge to achieve practical goals.
Every year, Diwali is the time when I make some time to remember my friends and wish them this auspicious day. During our childhood, making Diwali cards was our morning routine on Diwali, and then sharing and exchanging the cards with our friends in the evening. Recently even Netflix showed some nostalgic scenes in its Diwali teaser. I recommend watching this video if you haven't already. Here you go to the exact scene.
But as soon as we grew up into our teens, sending wishes using SMS became a thing and that was a different time too. I remember there used to be a different charge for sending messages on Diwali, and some of us used to share them a day or two earlier because it used to be cheaper. Everything changed with the advent of the internet. People started sending those messages through social media and messaging apps like Facebook and Whatsapp etc and this is something even I used to do.
Over time, these wishes that we found on Google images started looking too generic and emotionless. When I first found Canva, it offered a lot of unique and creative designs. Customization used to be so easy that I started adding some of my own touches and shaping the designs. It can be customized to a great extent. My designs turned into something that made me happy every time I looked at them. For the last 4 years, I have been doing that in the same way, going to Canva and editing the photos by their name and downloading it, and then sending them. Eventually, it became very time consuming, mostly due to repeating it over the web.
So this year I thought why not use the power of Python to design the card? All I really needed to do was a text message over one generic design which is common for all.
So I designed a generic image that looked like this.

I will definitely suggest you all to get Canva Pro it makes some of the customizing very easy as compared to the free tier.
In the final touch, it looked something like this.
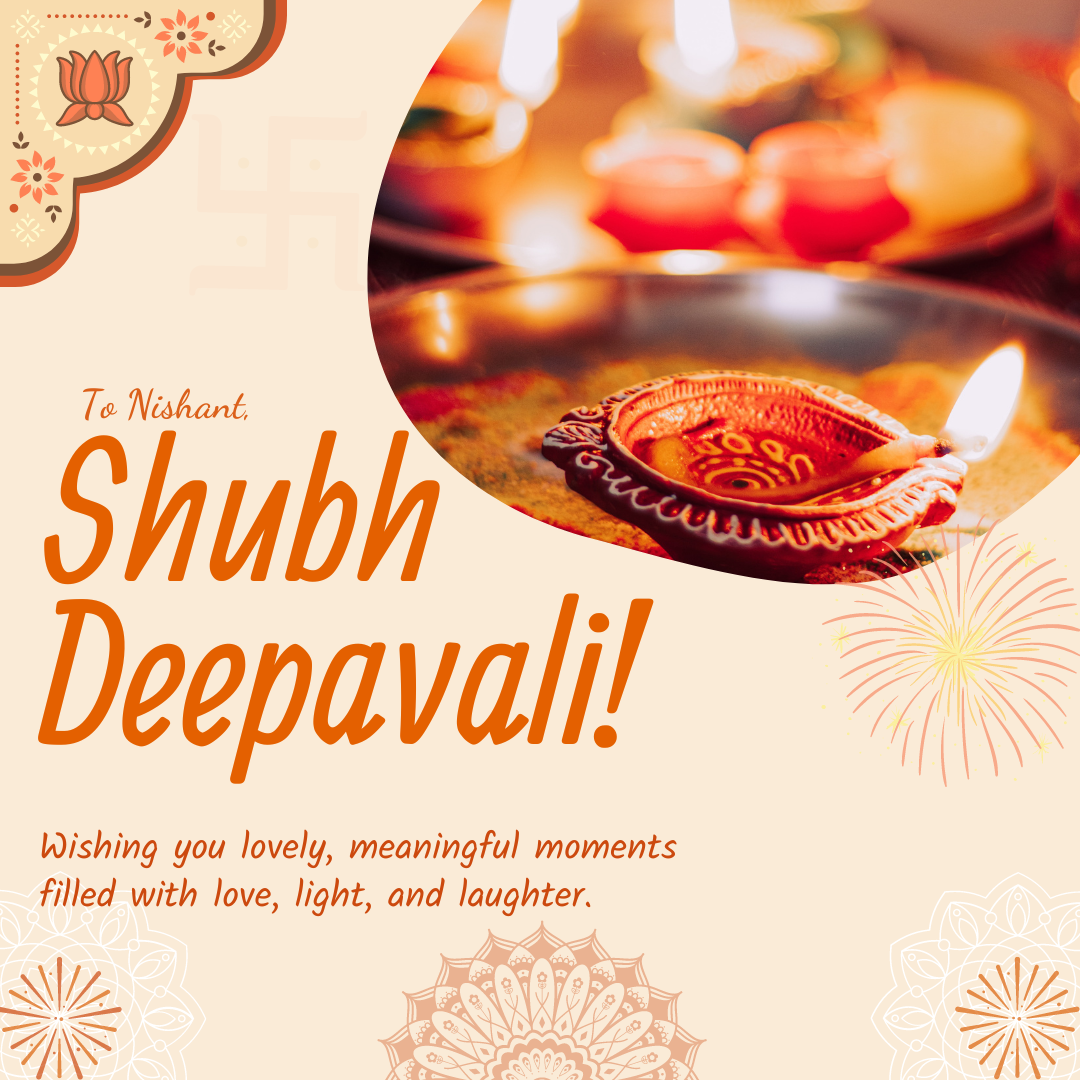 So to do that I really need to fidget around Python's Pillow Library and get the data from the CSV file.
Let's Build
Assuming that you must have Python and pip installed on your machine. Click here for how to do that. Now fire up your terminal and we gotta install Pillow and its dependencies.
pip install pillow
In case you are here just for the code, here you go. But if you want to understand the code then scroll down.
# import required classes
import csv

from PIL import Image, ImageDraw, ImageFont

# creates font object with the font file and specify the size
font = ImageFont.truetype("font.ttf", size=40)

with open('data.csv', 'r',newline='') as f:
    reader = csv.reader(f)
    i = 0
    for [message] in reader:
        i += 1
        # create Image object with the input image
        img = Image.open('download.png')
        imgDraw = ImageDraw.Draw(img)
        imgDraw.textsize(message, font=font)

        # postion as x y cordinates where the text needs to be added
        (xText, yText) = (80, 380)

        imgDraw.text((xText, yText), message, font=font, fill=(219, 96, 26))
        # saves the file with given message as name
        img.save(f'{message}.png')
Now it's your time to create a file named main.py or yourfilename.py in your folder of choice.
Add the import statement and the required classes from the Pillow Library.
import csv

from PIL import Image, ImageDraw, ImageFont
So what exactly these classes we are using:
Image- selects an image object for our images backgroundImageDraw- creates a drawing contextImageFont- selects a font for the text we will be drawing on the image
font = ImageFont.truetype("font.ttf", size=40)
It creates a font object with the font file and specifies the size. Here you can add your font of choice where you created the file. But if you want to use the system fonts then you can replace the ''font.ttf'' with something like "arial.ttf" or "helvetica.ttf" etc.
Now we need to open the CSV file and read each message from it.
with open('data.csv', 'r',newline='') as f:
    reader = csv.reader(f)
    i = 0
    for [message] in reader:
Now for each message we need to initialize the generic image and do the operations on it.
        img = Image.open('download.png')
        imgDraw = ImageDraw.Draw(img)
        imgDraw.textsize(message, font=font)

        (xText, yText) = (80, 380)

        imgDraw.text((xText, yText), message, font=font, fill=(219, 96, 26))
        img.save(f'{message}.png')
It is common for computer graphics to have an inverted coordinate system, which locates the origin at the top-left corner of the image. (xText, yText) are the coordinates and xText represents the distance from the left side of the text box (x=0), and yText represents the distance from the top side of the text box (y=0). You can use some online imaging tools to find the exact coordinates in the image and then replace the values with your values. Then it will save the file with the message as its name.
This blog wouldn't have been possible without these,